
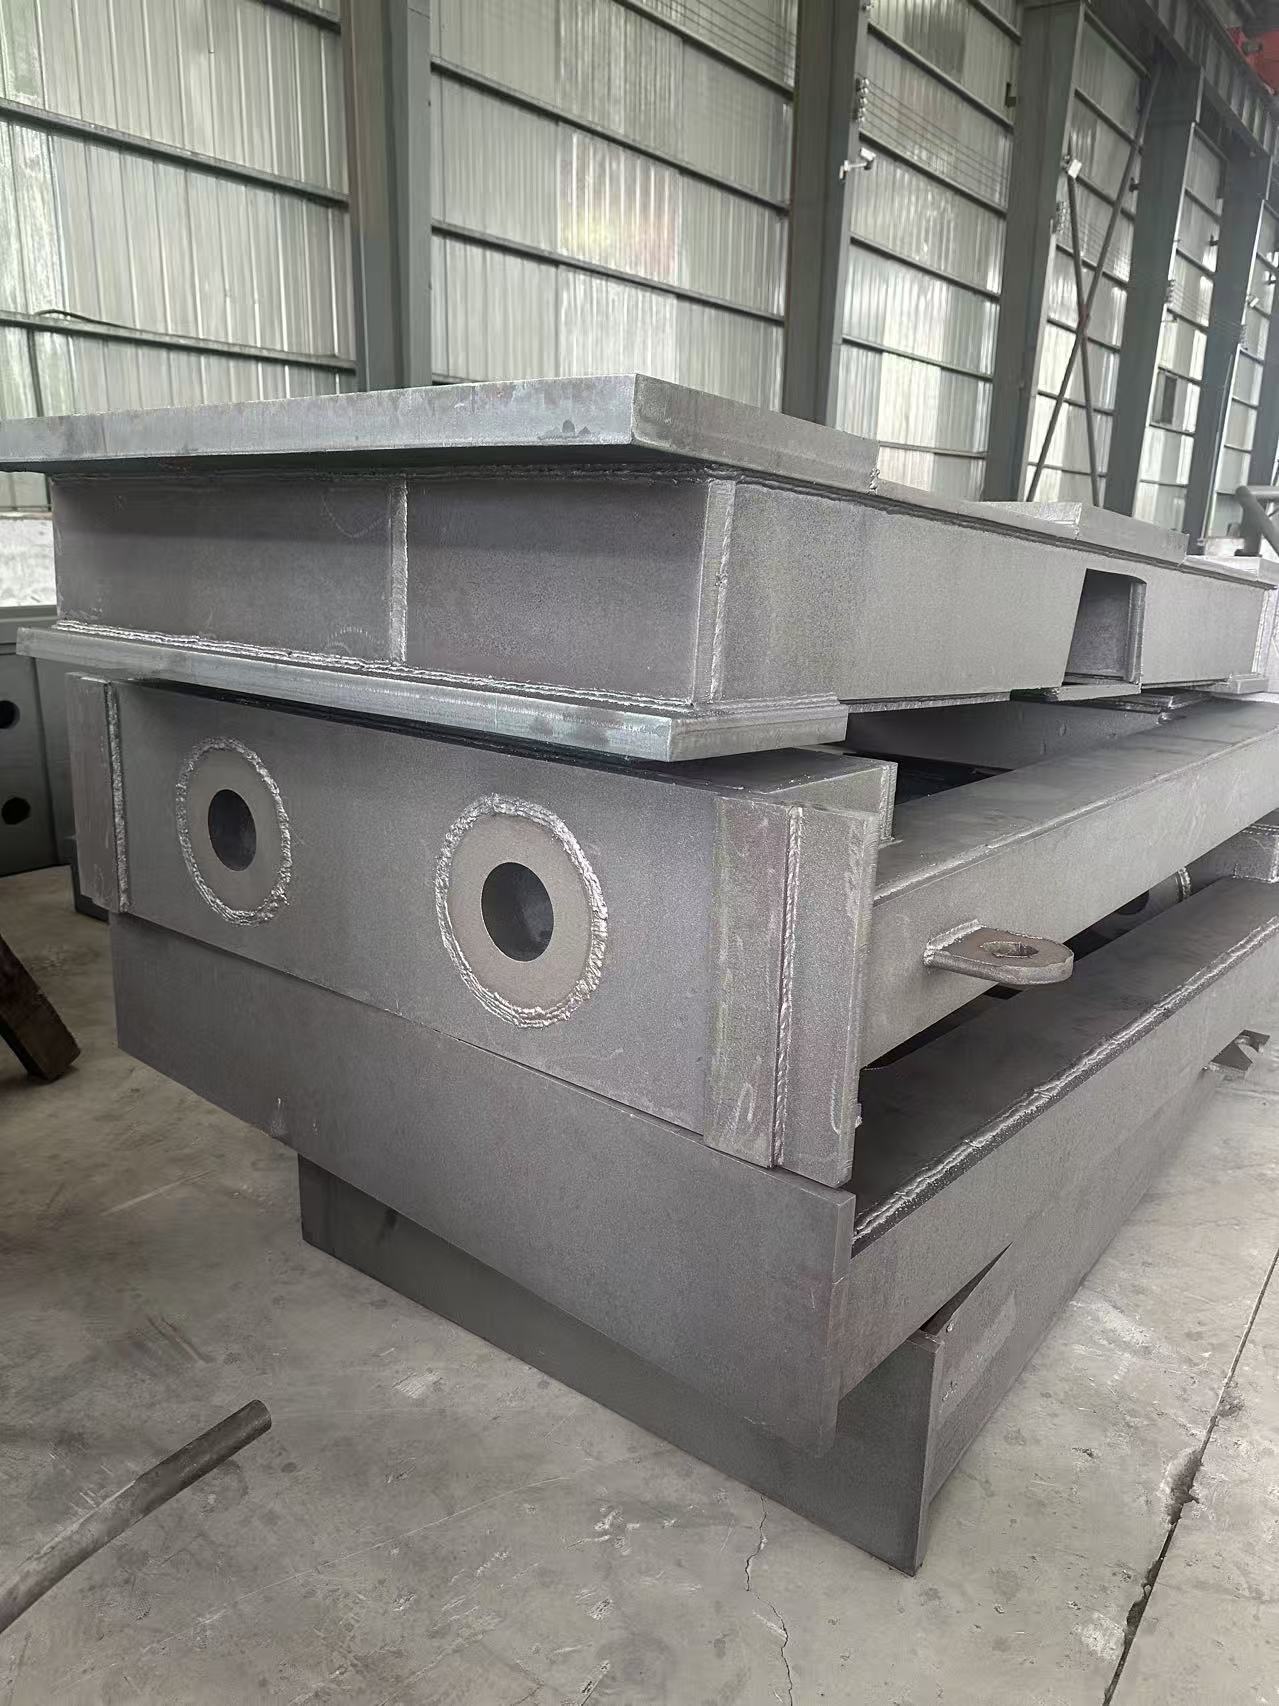
A weldment enquiry is not a table enquiry
A 3D welding table enquiry is mostly about configuration: hole system, hole spacing, flatness grade, surface treatment, size. The product already exists as a family, and the buyer is choosing parameters within it. A custom weldment enquiry is different in kind — there is no catalogue entry to configure, because the part starts from the buyer's own drawing.
That difference changes what the supplier needs in the first message. For a table, an approximate workpiece description is often enough to start a recommendation. For a weldment, the drawing is the product. Without it, the supplier can only guess at plate thicknesses, rib layouts, machining allowances and inspection points, and any answer would be a placeholder rather than a quotation.
It helps to say so explicitly in the enquiry: this is a build-to-print weldment, here is the drawing, and here is which surfaces matter. That single sentence puts the conversation on the right track and saves a round of clarification emails.
The drawing: what has to be on it
The drawing does not need to be a polished production package to start the conversation, but it does need to carry the information that drives fabrication decisions. A useful weldment drawing shows:
- The finished geometry with overall dimensions, so plate sizes and the fabrication plan can be assessed.
- Which surfaces carry tolerance — bores, pads, machined faces — marked as machined rather than as-welded.
- The material grade required, or the conditions the part must meet if the grade is open.
- Any interfaces that must line up with other equipment: mounting hole patterns, shaft bores, flat pads.
- Where welds are permitted and where they are not, especially near machined surfaces.
Material and the machining that follows
State the material grade on the drawing or in the enquiry text. BECO fabricates weldments from Q235 or Q355 steel plate as standard, with HT250 and HT300 cast iron and other materials available on request. If the application allows either steel grade, say so — the grade can then be confirmed at quotation against the workpiece and the process, alongside the construction decisions that carry the load with it.
The more important input, though, is which features will be machined. Machining after fabrication is what turns a welded assembly into a precise part: bores that accept bearings, pads that seat against machine frames, faces that mate with other components. Mark every surface that will be machined, and give its tolerance where it has one.
Machined features on a BECO weldment are cut after the body has been annealed. That sequencing is not an internal detail — it is the reason the geometry holds, and it is the next section's subject.
Why the sequence matters for your drawing
Welding leaves residual stress locked in the plate. If a bore or a machined face were cut into a freshly welded body, that residual stress would gradually release and pull the feature out of position. The part would measure correctly on the day it shipped and drift afterwards.
BECO's custom weldments go through controlled fabrication, then post-weld stress-relief annealing, then shot blasting. The anneal lets the residual stress relax through the whole body before any material is removed; the shot blast removes scale and leaves a clean, uniform surface ready for inspection and finish. Only then are the machined features cut — bores, pads and faces — so the geometry they define sits in a stable body and stays where it was measured.
For the buyer, this has a practical implication for the drawing: tolerance-critical features should be specified as machined features, not attempted as weld-positioned geometry. A bore located by the weldment itself will never hold the tolerance of a bore machined after stress relief. Design the drawing so the accuracy lives where the process can deliver it — in the machining operations — and let the fabrication carry the bulk geometry.
The same logic applies if the weldment is part of a larger order. A weldment produced alongside welding tables and fixtures in one workshop follows the same production discipline the process page describes: fabricate, stress-relieve, shot blast, machine, inspect, treat, pack.
What is checked before it is packed
Before any weldment leaves the workshop, it is checked against the agreed specification: dimensions, hole layout where the drawing defines one, and any flatness requirement agreed for the machined surfaces. Accessories in a combined order are matched to the relevant hole system before dispatch, and every item follows the confirmed drawing — the same document that started the enquiry.
This is worth mirroring on the buyer's side. When the weldment arrives, check it against the drawing: overall dimensions, the position and size of machined features, the condition of the surfaces. The receiving-inspection guide written for welding tables applies to any machined fabrication — record what you find with photos and positions, and raise anything unexpected with the supplier before rework rather than after.
If the order combines weldments with platforms or fixtures, state that in the enquiry. Quoting them together keeps the interfaces consistent — the same confirmed drawing governs the batch, and parts that must mate arrive having been made to the same document.
What to send with your weldment enquiry
In one message: the drawing (PDF is fine to start), the material grade or the freedom to choose it, the machined features with their tolerances, and a sentence about how the part is used. If there are interfaces to other equipment, a sketch or the mating part's outline helps more than words.
The response comes back the same way table enquiries do: as a confirmed drawing before production, with the material, the machining scope and the agreed checks written into it. From confirmation, delivery is typically around 10 days, per configuration. If anything in the drawing is ambiguous, the clarification happens before production — which is exactly why the first enquiry is worth making complete.
For the general enquiry workflow — what to include whether the product is a table, a fixture or a weldment — the RFQ preparation guide covers the shared basics; this article has covered what is specific to build-to-print weldments.